

How to Groom Anxious Pets at Home: A Calm Approach

Table of Contents
- Pet Grooming Anxiety Signs: What Your Pet Is Telling You
- Calming Aids for Dog Grooming: Tools and Products That Help
- How to Desensitize Dog to Brush: Step-by-Step
- Step 1: Set Up a Calm Grooming Environment
- Step 2: Master Gentle Handling and Restraint-Free Techniques
- Step 3: Use Positive Reinforcement and Short Sessions
- Step 4: Choose Low-Vibration, Quiet Grooming Tools
- Emergency De-escalation: What to Do When Your Pet Panics
- Frequently Asked Questions
Last Updated: September 14, 2026
Pet Grooming Anxiety Signs: What Your Pet Is Telling You
Learning how to groom anxious pets at home starts with reading the signals your pet sends before the clippers come out, and knowing when to groom anxious pets at all. Pet grooming anxiety signs, tucked tail, lip licking, flattened ears, trembling, tell you a pet is approaching its stress threshold. This guide from Smitty's Pet Store covers the full desensitization process, from those signals to handling a full panic episode safely.

Most owners miss the early warnings and only react once the pet is over threshold, when training has stopped and damage control has begun.
Watch for these signs, roughly in order of escalating stress:
- Early: yawning, lip licking, turning the head away, freezing in place
- Moderate: tucked tail, flattened ears, dilated pupils, trembling, pulling away from your hands
- Late: growling, snapping, attempting to bolt, losing bladder control, whale eye (whites showing)
Body language is the whole conversation. A pet that turns its head away is asking for a pause. A pet that freezes is not calm, it is shut down.
Calming Aids for Dog Grooming: Tools and Products That Help
Calming aids for dog grooming fall into three layers: consumables that lower baseline arousal, physical gear that removes the need for restraint, and sensory tools that mask triggers. None replaces desensitization training, but stacked correctly they make early sessions survivable while training takes hold.
Timing is everything. A calming aid given after the pet is over threshold does almost nothing, because the physiological stress response, elevated heart rate, cortisol release, muscle tension, is already running. Aids work on the front end, before the clippers come out.
Calming Chews and Supplements
Calming chews and supplements reduce mild situational anxiety. Their active ingredients work through different mechanisms, so knowing which is which helps you pick:
- L-theanine, an amino acid found in green tea; most practitioners find it takes the edge off without sedation, typically 30 to 60 minutes to onset (vcahospitals.com).
- Casein hydrolysate, a milk protein derivative; often used for situational stress and commonly dosed by body weight.
- Chamomile and valerian root, herbal sedatives; effects vary widely by pet and product.
- Pheromone analogs, not edible, but often paired with chews; these mimic a species-specific calming pheromone and work through scent rather than digestion.
Two mistakes are common: giving a chew ten minutes before a session (most need 30 to 60 minutes to take effect), and expecting a supplement to work on a pet already at panic level, when a mild anxiolytic will not register.
Ask your veterinarian before introducing any supplement, especially for pets on medication, with liver or kidney conditions, or under a year old (avma.org). Some ingredients interact with prescriptions, and dosing by weight matters more than the label suggests.
Comfort Toys and Restraint-Free Gear
Restraint-free gear changes the physics of grooming so you never have to pin a nervous pet down. Two categories matter most here.
Comfort toys provide a soothing anchor. A plush toy with a heartbeat accessory, like the Comfort Pet Toys at Smitty's Pet Store, mimics a mother's heartbeat and gives anxious pets something warm and familiar to lean against. The steady pulse and warmth trigger the same calming response a littermate would, which is why these work better on puppies and recently rehomed pets than on older dogs with established fears.

Restraint-free handling aids keep paws accessible without force. The Pet Nails Trimming Pet Grooming Hammock suspends a pet in a supported sling so you can trim nails with both hands free, far less stressful than wrestling a paw into position. For pets that nip at their own legs, the Pet Grooming Inflatable Protective Cover creates a soft barrier between mouth and skin, so you can work without a muzzle.

A trade-off worth knowing: hammocks and slings work well for nail trims and paw work, but they are not appropriate for full-body brushing or clipping, because the pet cannot shift its weight or signal discomfort the way it can standing on a stable surface. Use them for the specific task they were designed for, then return the pet to the floor.
How to Desensitize Dog to Brush: Step-by-Step
Desensitization pairs a grooming tool with something good, slowly enough that the pet never crosses into fear. Counter-conditioning replaces a fearful response with a positive one. Together they do more than any single tool.
The sequence below is the same one professional fear-free groomers use, scaled down for home.
- Show the brush, don't touch. Let the pet sniff it. Treat. Repeat for a few days.
- Touch the brush to a neutral body part. One second of contact on the shoulder, then treat. Stop.
- Brush one stroke, then treat. One stroke only. End the session.
- Extend to two or three strokes. Add duration only when the pet stays relaxed.
- Move to sensitive areas last. Legs, paws, tail, and face come after the body is easy.
Step 1: Set Up a Calm Grooming Environment
A calm grooming environment removes sensory overload before it starts. Pick a quiet room with dim lighting, a non-slip surface, and no other pets or people moving through. Close the door, silence the TV, and mute your phone.
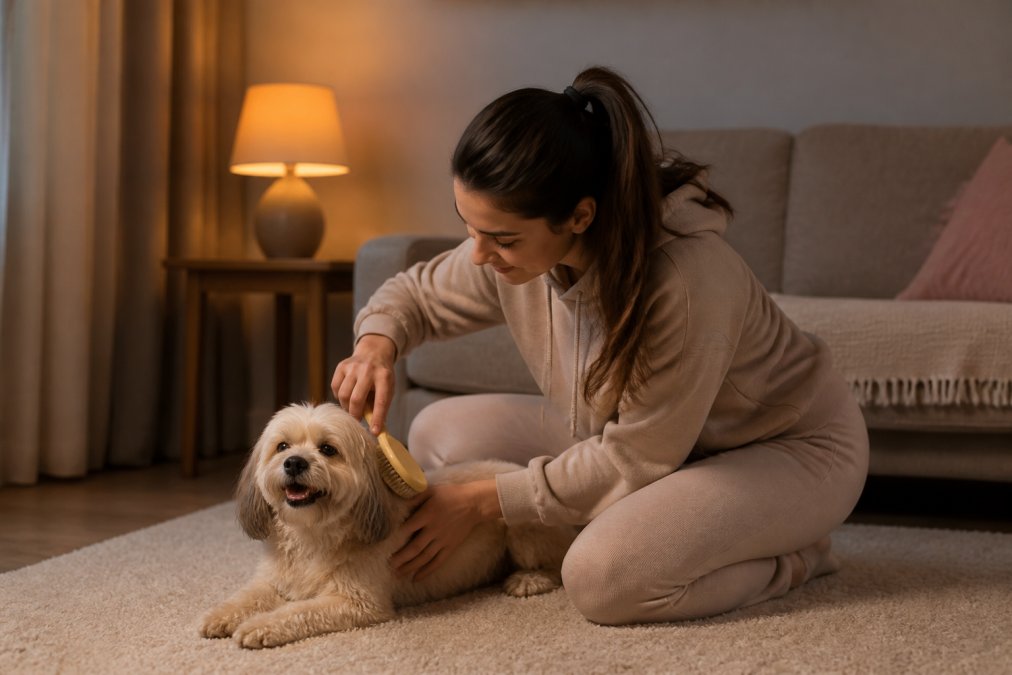
Set out everything before the pet enters the room: brush, clippers, treats, towel. Every mid-session trip to grab a comb is a chance for the pet to bolt and the calm to break.
A common mistake is grooming on slick tile or a raised table the pet has never seen. Both create instability, which reads to a nervous pet as danger. A bath mat or a low, familiar surface works better than any professional table for a pet still building trust.
Step 2: Master Gentle Handling and Restraint-Free Techniques
Gentle handling means using the minimum contact needed and never trapping a pet in a position it cannot escape. Restraint-free grooming is that principle in practice.
Start with the least invasive hold possible: one hand supports the chest while the other works. If the pet pulls away, release, pause, and reset. Never chase a paw or clamp a limb. A pet that learns it can leave will often choose to stay.
For nails specifically, a hammock-style sling lets you lift one paw at a time without gripping the leg. The pet stays upright and supported, which feels far less like being held down.
Step 3: Use Positive Reinforcement and Short Sessions
Positive reinforcement means the pet gets something it genuinely wants, immediately after the behavior you want. For grooming, that means high-value treats reserved only for this work, delivered within a second of the calm behavior.
Keep sessions short. Two to five minutes is enough for a nervous pet in the early weeks. Consistency matters more than duration: five short sessions across a week beat one long session every time.
Use a marker word like "yes" the instant the pet stays still, then treat. The order matters. Mark, then reward, every time.
Step 4: Choose Low-Vibration, Quiet Grooming Tools
Low-vibration clippers and quiet tools remove two of the biggest sensory triggers: noise and tactile sensitivity. A standard clipper buzzes at a frequency many pets find alarming, and the vibration against skin is its own stressor.
The Professional Pet Grooming Kit at Smitty's Pet Store uses a quiet motor and a detachable blade designed to glide through coat without pulling. The cordless design also means you can work at the pet's pace rather than being tethered to an outlet.
Before the first real groom, run the clippers on a table near the pet while it eats. Let the sound become background noise before it ever touches skin.
Emergency De-escalation: What to Do When Your Pet Panics
Most grooming guides stop at "stay calm and take a break." That fails the moment a pet actually panics, because a panicking pet is not processing language, treats, or reassurance. What follows is a structured protocol for the mid-session panic, when stress crosses into full fight-or-flight, plus what to do in the hours and days after.
What a Panic Episode Actually Looks Like
A true panic episode is distinct from ordinary nervousness. Watch for the cluster:
- Physiological: hard panting without heat, wide pupils that do not respond to light change, drooling, sudden emptying of anal glands, loss of bladder or bowel control.
- Behavioral: frantic scrambling, attempts to climb the handler, biting at the air or at restraints, complete non-response to name or treats.
- Vocal: high-pitched yelping or screaming that does not stop when the trigger is removed.
A pet showing this cluster is not being stubborn. Its nervous system has taken over, and reasoning, coaxing, and correction will all make it worse.
The Mid-Session Protocol
- Stop and go silent. Turn off the clippers, set them down out of sight, and remove your hands. No talking, no touching, no eye contact for 30 seconds. Verbal reassurance at this stage often reads as added stimulation.
- Reduce the room. Dim the lights or drape a towel over the pet's carrier if that is where it retreats. Lower the number of sensory inputs before you try to interact again.
- Offer an exit. Open the door and let the pet leave if it wants to. Choice is the single fastest way to bring arousal down, because it restores a sense of control the pet just lost.
- Wait for full recovery, not partial. Signs of full recovery: relaxed ears, soft eyes, normal breathing rate, and, critically, taking treats again. A pet that has stopped panting but still refuses food is not recovered.
- End the session. Do not restart. Do not "just finish the nails." The training value of the session is already lost, and pushing through teaches the pet that the panic was justified.
The 48-Hour Recovery Window
What you do after the panic matters as much as what you did during it. A pet that panics on Monday and is groomed again on Tuesday will generalize the fear to the room, the tools, and you.
- Day 1: No grooming tools. No grooming room. Short, easy positive interactions, a walk, a chew, a favorite game. Rebuild the association between you and safety.
- Day 2: Bring out one neutral item (a brush, not clippers) in a different room. One sniff, one treat, done. Do not attempt the step that triggered the panic.
- Day 3 onward: Resume desensitization at least two steps below where the panic happened. If the panic occurred during nail work, go back to handling paws with no tools at all.
When Panic Is Not Behavioral
Some episodes that look like grooming panic are medical. Seek veterinary evaluation if any of the following apply:
- The pet panics during grooming but is calm in every other context, including at the vet.
- The panic started suddenly in an adult pet with no prior grooming anxiety.
- The pet shows pain signals, yelping when a specific limb or area is touched, reluctance to bear weight, or sensitivity that was not there before.
- The pet has a known condition such as arthritis, hip dysplasia, or a thyroid disorder, all of which can amplify stress responses.
If a pet panics repeatedly despite slow desensitization, or shows aggression that risks injury, stop home grooming and consult a veterinarian or certified fear-free professional groomer. Some anxiety has medical roots, and a vet can rule those out before you invest months in training that will not resolve the cause.
Frequently Asked Questions
What are the signs and symptoms of extreme anxiety in dogs during grooming?
Extreme anxiety signs include trembling, tucked tail, flattened ears, lip licking, yawning, whale eye (showing the whites), panting when not hot, and attempts to escape or freeze. Some pets may drool excessively or lose bladder control. Recognizing these pet grooming anxiety signs early lets you pause and adjust your approach before fear escalates. If your pet shows these signs consistently, consult a veterinarian or certified fear-free groomer for a behavior plan.
How can I desensitize my pet to grooming tools?
Start by leaving the tools out in the open so your pet can sniff them. Pair the tool's presence with high-value treats. Turn on clippers without touching your pet, reward calm behavior, then gradually touch the tool to their body for one second and treat. Progress at your pet's pace. For a step-by-step method on how to desensitize dog to brush, see our guide above. Consistency and patience are key; never force interaction.
When should I consult a professional for my pet's grooming needs?
If your pet's anxiety leads to injury, extreme panic, or if you cannot safely complete basic grooming, seek a professional. A veterinarian can rule out medical causes and may prescribe anti-anxiety medication for grooming sessions. Certified fear-free groomers use restraint-free techniques and can work with your pet's behavior. For severe cases, a veterinary behaviorist can create a customized desensitization plan.
What are the best calming techniques for pets during grooming?
Use a quiet room, non-slip surface, and keep sessions under 10 minutes. Offer high-value treats like freeze-dried liver or cheese. Try calming aids for dog grooming such as pheromone sprays, calming chews, or a heartbeat comfort toy. Speak in a soft, calm voice and take breaks if stress signals appear. Never restrain forcefully. Pair grooming with positive reinforcement so your pet associates it with good things.
Grooming a nervous pet at home is not about endurance, it is about trust built one short session at a time. If you would rather not source every tool yourself, Smitty's Pet Store curates the gear that makes the process easier: a heartbeat comfort toy for soothing, a restraint-free hammock for nail trims, and a quiet grooming kit for coat work. Get started with Smitty's Pet Store and give your pet a grooming routine that feels safe instead of scary.