

How to Clean Dog Ears Step by Step (2026 Guide)

Table of Contents
- What You'll Need Before You Start
- How to Clean Dog Ears Step by Step
- Choosing the Right Dog Ear Cleaning Solution
- How Often to Clean Dog Ears (and When to Skip It)
- Signs of Dog Ear Infection: When Cleaning Isn't Enough
- Troubleshooting Difficult Dogs and Breed-Specific Ears
- Post-Cleaning Care and Common Mistakes to Avoid
- Frequently Asked Questions
Last Updated: September 25, 2026
What You'll Need Before You Start
Gather these items first:
- A veterinary ear-cleaning solution made for dogs
- Cotton balls or gauze sponges
- A towel or two
- Treats for positive reinforcement
- A helper, if your dog is wiggly
Set up in a bright room on a non-slip surface. A bathroom or kitchen floor works well because cleanup is easy.

How to Clean Dog Ears Step by Step
The full process takes about five minutes once your dog is used to it. Work calmly, keep sessions short, and stop if your dog shows real distress. If your dog has an active infection, your vet's instructions override this routine.
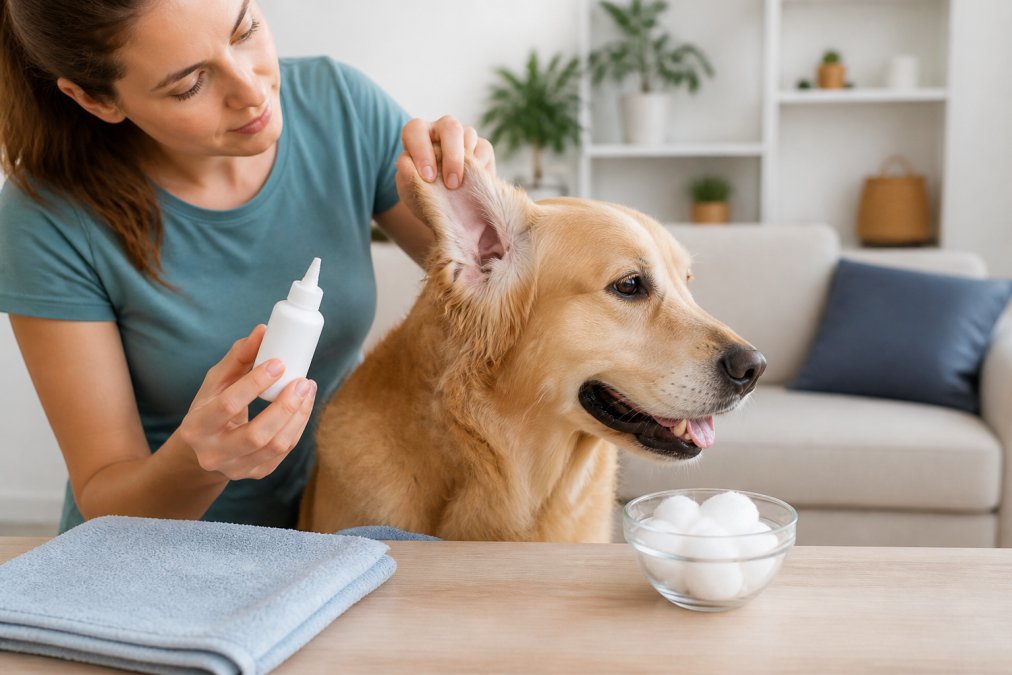
Step 1: Prepare Your Dog and Your Workspace
Start with a relaxed dog, not one who just sprinted the backyard. Let your dog sniff the bottle and give a treat. This builds a positive association before anything touches his ears.
Step 2: Apply the Solution and Massage the Ear Base
Lift the ear flap (the pinna) so you can see the canal opening. Squeeze a liberal amount of solution into the canal, it needs to reach the wax, not just coat the flap.
Step 3: Let Them Shake, Then Wipe the Pinna and Canal Opening
Step back and let your dog shake his head, the most effective way to bring loosened debris up and out of the canal. Expect some spray, which is why the towel matters.
Choosing the Right Dog Ear Cleaning Solution
The best dog ear cleaning solution depends on your dog's ears, not on which bottle has the loudest label. Look for a product labeled for pets and formulated to dissolve wax and reduce odor.
| What to Look For | Why It Matters |
|---|---|
| Labeled for pets | Human products can irritate the canal |
| Wax-dissolving formula | Lifts debris instead of just wetting it |
| Odor control | Signals it targets bacteria and yeast |
| Safe for regular use | Supports a 2-4 week routine |
| Works for dogs and cats | One bottle covers a multi-pet home |
How Often to Clean Dog Ears (and When to Skip It)
Most healthy dogs need their ears cleaned every two to four weeks. Dogs who swim, have floppy ears, or produce a lot of wax may need it weekly. Ask your vet what schedule fits your dog.
Skip cleaning if you see any of these:
- Redness or swelling inside the ear
- Discharge that looks like pus or dark debris
- A foul odor
- Your dog yelps when the ear is touched
- Head shaking or scratching that won't stop
Signs of Dog Ear Infection: When Cleaning Isn't Enough
Most guides hand you a list of red flags and stop there. The harder skill is telling a normal ear from an inflamed one before you squeeze anything into the canal, because the wrong call turns a minor problem into a vet visit. Use the comparison below as your stop-or-go check.
Healthy Ear vs. Infected Ear: A Side-by-Side Check
| What You're Looking At | Healthy Ear | Infected Ear |
|---|---|---|
| Color of the canal skin | Pale pink, similar to your dog's gum color | Red, angry pink, or purple-tinged |
| Swelling | Flap lies flat and feels soft | Flap feels thickened, hot, or puffy |
| Debris | Thin, light-tan wax coating | Dark brown, black, or coffee-ground-like gunk |
| Discharge | None, or a trace of clear wax | Yellow, green, or pus-like fluid |
| Smell | Neutral or faintly waxy | Musty, yeasty, or outright foul |
| Dog's reaction to touch | Tolerates handling, may lean in | Pulls away, yelps, or snaps |
| Ear position | Normal carriage for the breed | Head tilt, or one ear held lower |
A healthy ear should look close to the inside of your dog's lip: pink, smooth, and mostly dry with a light waxy film. If you have to squint to decide whether it's red, stop and call your vet.
The Red Flags That Mean Stop
Skip the cleaning session and contact your veterinarian if you see any of these:
Pet Ear Cleaning Drops 60ml — For Dogs →
- Redness or swelling that wasn't there last week
- Discharge that looks like pus, or dark debris that returns within days of cleaning
- A foul odor that lingers after you've wiped the flap
- Your dog yelps, flinches, or snaps when the ear is touched
- Head shaking, scratching, or head tilting that won't stop
- Crusty scabs, sores, or a swollen flap (called an aural hematoma)
- Balance problems, circling, or nausea
Why Cleaning an Infected Ear Makes It Worse
The canal runs in an L-shape down and then inward toward the eardrum. When the tissue is inflamed, it swells and narrows that passage, so pushing solution and debris drives bacteria and yeast deeper toward the tympanic membrane and can rupture it. Clean healthy ears on a schedule; leave infected ears to your vet.
What Your Vet Will Likely Do
A typical exam involves looking into the canal with an otoscope, sometimes taking a swab to identify whether yeast, bacteria, or ear mites are the cause. Treatment usually means a medicated ear drop or ointment prescribed for that specific organism, not a general cleaning solution. Many vets ask you to finish the full course even after the ear looks normal again, because stopping early lets the infection rebound.
Troubleshooting Difficult Dogs and Breed-Specific Ears
Some dogs fight the process, and some breeds have ears built to trap trouble. Both problems have workarounds, and the fix starts with understanding why your dog is resisting rather than forcing the routine.
Reading the Resistance
Not all resistance is the same. Match your approach to what you're seeing:
- Head-shy (pulls away when you reach for the ear): Usually a trust issue, not a pain issue. Spend a week on touch-only sessions, no bottle, no solution. Touch the ear flap, treat, release. Repeat until the flinch disappears.
- Anxious (trembles, tucks tail, freezes): Shorten sessions to one ear per day and pair every touch with a high-value treat. A lick mat or frozen stuffed toy keeps the mouth busy and lowers arousal.
- Pain-reactive (yelps or snaps when the ear is touched): Stop. This is a medical signal, not a training problem. Book a vet exam before you attempt another cleaning.
- Wiggly but happy (won't hold still, tail wagging): This is a restraint problem, not a fear problem. A second person steadying the chest, or a non-slip mat under the paws, usually solves it.
Handling Techniques That Actually Work
- Sit on the floor with your dog beside you, not in front of you. Looming over a dog triggers the same reflex as a predator overhead.
- Keep your body turned sideways so you're not squared up face-to-face.
- Rest the ear flap between your thumb and forefinger rather than gripping the base of the ear.
- If you need a second set of hands, have your helper place one flat palm on the chest and the other under the belly, not around the neck.
- Work in five-minute windows. If your dog is still relaxed at the three-minute mark, finish on a win rather than pushing to both ears.
- If nothing works after two weeks of desensitization, ask your vet or a professional groomer to demonstrate a hold that fits your dog.
Floppy Ears vs. Erect Ears: Why Anatomy Changes the Routine
Ear shape, not dog size, predicts how much maintenance an ear needs. The difference comes down to airflow and moisture.
When to Hand It Off
If your dog has a hairy canal, recurring infections, or a history of ear problems, a professional cleaning every few months can be beneficial. Many groomers include ear cleaning in a standard bath, and your vet can demonstrate the technique during a routine exam so you can replicate it at home.
Post-Cleaning Care and Common Mistakes to Avoid
After cleaning, reward your dog right away so the next session starts easier. Wipe away any solution that dripped onto the fur, since it can leave a sticky residue. Check the ears again in a few days for new wax or odor.
The mistakes we see most often:
- Using cotton swabs inside the canal
- Cleaning an infected ear instead of calling the vet
- Skipping the massage, which leaves solution sitting on the flap
- Reusing the same cotton ball on both ears
- Cleaning too often and irritating healthy skin
Frequently Asked Questions
What can I use to clean out my dog's ears at home?
Use a veterinary ear-cleaning solution made for dogs, plus cotton balls or gauze sponges. Avoid cotton swabs, Q-tips, and home remedies like hydrogen peroxide or vinegar unless your vet specifically recommends them. A product like Smitty's Pet Store's Pet Ear Cleaning Drops ($23.06) dissolves wax, dirt, and debris in the ear canal and works for all breeds and sizes. Never push anything into the canal itself; you only clean what you can see and reach.
How often should I clean my dog's ears?
Most dogs do well with a cleaning every 2 to 4 weeks as part of their regular grooming routine. Dogs with floppy ears, heavy wax buildup, or a history of infections may need more frequent cleanings, while some dogs can go longer. Your vet can set a schedule based on your dog's ear anatomy and history. If you notice discharge, redness, or a foul odor, stop routine cleaning and have your dog examined.
What are the signs of a dog ear infection I shouldn't ignore?
Watch for head shaking, scratching at the ear, redness or swelling of the ear flap, discharge, a foul odor, or tenderness when you touch the ear. These signs of dog ear infection mean the ear needs a vet's evaluation, not more cleaning at home. Cleaning an infected ear with a routine solution can push debris deeper or irritate inflamed tissue. If you see any of these signs, book a veterinary visit before resuming your normal cleaning schedule.
Can I use my fingers or Q-tips to clean my dog's ears?
Fingers can gently wipe the visible part of the ear flap, but they can't reach into the canal, and Q-tips should stay out entirely. Cotton swabs can push cerumen and debris deeper toward the tympanic membrane (eardrum), and a sudden head movement can cause injury. The safer method is to saturate the canal with a veterinary solution, massage the base of the ear for 20 to 30 seconds, let your dog shake, then wipe the loosened debris from the ear flap with a cotton ball.