

5 Best Dog Grooming Clippers for Beginners in 2026

Table of Contents
- Quick Comparison: 5 Best Dog Grooming Clippers for Beginners
- 1. Professional Pet Grooming Kit: Best Overall for Beginners
- 2. Pet Nail Grinder: Best for Nail Care Alongside Clipping
- 3. Pet Grooming Brush Tool Vacuum Attachment: Best for Deshedding Before You Clip
- 4. Dog Grooming Comb: Best Finishing Tool After Clipping
- 5. Pet Grooming Hammock: Best for Keeping Your Dog Still During Clipping
-
How to Groom a Dog at Home: A Beginner's Step-by-Step Approach
- Step 1: Deshed and detangle before anything else
- Step 2: Bathe and dry completely
- Step 3: Pick your blade and guard comb by body zone
- Step 4: Clip the body first, working with the coat
- Step 5: Trim paws, sanitary area, and face last
- Step 6: Grind nails, then comb through to check your work
- If something goes wrong: troubleshooting the first groom
- Match the tool to the coat type
- Quiet Dog Clippers for Anxious Pets: What Actually Helps
- Frequently Asked Questions
Last Updated: September 21, 2026
Quick Comparison: 5 Best Dog Grooming Clippers for Beginners
The best dog grooming clippers for beginners stay quiet, fit your hand, and don't scare your dog before the first pass. This guide from Smitty's Pet Store covers five beginner-friendly tools, plus how to groom a dog at home, which blade sizes to use, and the mistakes that send most first-timers running to a professional groomer.
| Product | Price | Best For | Key Spec |
|---|---|---|---|
| Professional Pet Grooming Kit | $39.40 | Best overall for beginners | Cordless, 60-min runtime, 4 guide combs |
| Pet Nail Grinder | $29.99 | Nail care alongside clipping | High-speed rotating grinding head |
| Vacuum Brush Attachment | $30.82 | Deshedding before you clip | Suction collects loose hair |
| Dog Grooming Comb | $24.92 | Finishing after clipping | Stainless steel, non-slip handle |
| Pet Grooming Hammock | $26.87 | Keeping your dog still | Three sizes, double-layer cloth |
1. Professional Pet Grooming Kit: Best Overall for Beginners
For a first clipper, this kit is cordless, light, and quiet enough to chase a squirmy dog around the living room without a cord snagging on furniture.

Key Specs and What's in the Box
- Cordless, 60 minutes of runtime after about five hours of charging
- Works while charging, so a dead battery won't stall a groom
- Five comb settings from 0.8mm to 2mm
- Four guide combs: 3mm, 6mm, 9mm, and 12mm
- Includes steel comb, nail clippers, file, and cleaning brush
- Buy one, get one free US Adapter :-) HM14644
Pros and Cons
Pros: Quiet enough for most anxious dogs, light in the hand, and the guide combs cover short trims through to a longer puppy cut. The full kit means you don't buy a comb and nail clippers separately.
2. Pet Nail Grinder: Best for Nail Care Alongside Clipping
Clipping a coat is half the job. Nails grow faster than most owners expect, and long nails change how a dog stands, throwing off their gait over time.
Pros and Cons
Pros: Gentler learning curve than clippers for nails, works across sizes, and the push-switch design is simple to operate one-handed.
3. Pet Grooming Brush Tool Vacuum Attachment: Best for Deshedding Before You Clip
Here's the part most guides get wrong: they send beginners straight to the clippers. Clipping a matted or heavily shedding coat is how blades jam and dogs get nicked. This attachment connects to your vacuum and pulls loose undercoat hair straight into the canister, no fur cloud, no cleanup.
Pros and Cons
Pros: Mess-free, works on all coat types and sizes, and hand-washes clean in warm water.
4. Dog Grooming Comb: Best Finishing Tool After Clipping
A comb is the tool beginners underestimate. Run it through the coat after clipping and it catches any ridge or patch you missed, plus loose surface hair. This one has a stainless steel body with a rubber non-slip handle, so it stays put in a wet hand, and it works on cats as well as dogs.
5. Pet Grooming Hammock: Best for Keeping Your Dog Still During Clipping
The single biggest reason first grooms go wrong isn't technique. It's a dog that won't stay put.
The double-layer cloth holds weight evenly.
How to Groom a Dog at Home: A Beginner's Step-by-Step Approach
Learning how to groom a dog at home comes down to order of operations: deshed, bathe, dry, clip, then finish. Skip a step and you'll fight the coat instead of cutting it.
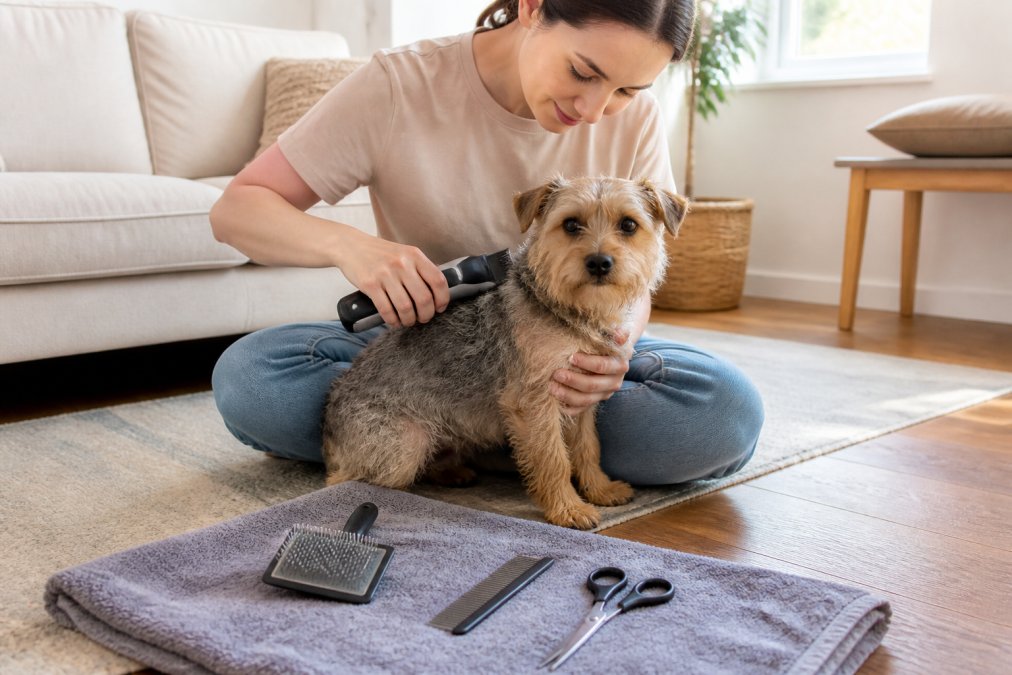
Step 1: Deshed and detangle before anything else
Run the vacuum brush attachment or a slicker brush over the entire coat, working in the direction of hair growth. Pay extra attention to the neck ruff, behind the ears, the armpits, the belly, and the tail base, where mats form first. If you hit a mat you cannot comb through with light pressure, stop.

Step 2: Bathe and dry completely
Damp fur clogs blades and drags against the cutter, making the clipper pull hair instead of slicing it. Towel dry, then use a forced-air dryer or a human hair dryer on the cool setting until the coat is bone dry to the skin. A coat that feels dry on top but is damp underneath will jam your blade within minutes.
Professional Pet Grooming Kit →
Step 3: Pick your blade and guard comb by body zone
Blade numbers run in reverse, a #10 blade leaves about 1/16 inch of coat, a #7F about 1/8 inch, and a #4F about 1/4 inch. Lower numbers leave more hair. For a first groom, the safest setup is a #10 blade under a plastic guard comb, which keeps the cutting edge off the skin entirely.
| Body zone | Blade / guard | Why |
|---|---|---|
| Back and sides | #10 blade + 6mm or 9mm guard comb | Even length, low risk of nicking |
| Legs | #10 blade + 9mm or 12mm guard comb | Leaves enough coat to hide uneven passes |
| Face and muzzle | #10 blade, no guard, or scissors | Short strokes, blade flat to the skin |
| Paws and sanitary area | #10 blade, no guard | Tight work needs visibility |
| Ears | Scissors only | Clippers catch thin ear leather easily |
Step 4: Clip the body first, working with the coat
Start at the shoulder and move toward the tail, following the direction the hair grows. Use long, overlapping strokes rather than short choppy ones, and let the clipper do the work, pushing hard slows the blade and heats it up. On the second pass, go against the grain only if you want a shorter, smoother finish and your dog is calm.
Step 5: Trim paws, sanitary area, and face last
Switch to a smaller guard comb or no guard at all. Hold the paw pad up and clip between the pads with the blade parallel to the skin. For the sanitary area, use short strokes and keep a finger between the blade and any loose skin. For the face, most beginners do better with rounded-tip scissors.
Step 6: Grind nails, then comb through to check your work
Grind nails in short two-second passes per nail so the head does not heat up. Then run the steel comb through the whole coat. Anywhere the comb snags is a ridge you missed, go back over it with the same guard comb you used on that zone.
If something goes wrong: troubleshooting the first groom
- You nicked the skin. Apply styptic powder or cornstarch to stop the bleeding, clean the area with warm water, and stop clipping for the day.
- The coat looks patchy. You changed guard combs mid-zone or used inconsistent stroke direction. Go over the whole zone again with one guard comb, in one direction.
- The blade is pulling hair instead of cutting. The blade is dull, dirty, or the coat is damp. Clean the blade, let it cool, and check that the coat is fully dry.
- The blade is hot against the skin. Stop, let it cool for five minutes, and re-oil it. Running a hot blade is how most clipper burns happen.
- Your dog will not hold still. Split the groom across two sessions. Half a coat today beats a wrestling match that makes next month harder.
Match the tool to the coat type
Most beginner guides treat every dog the same. They are not.
| Coat type | Examples | What works | What to avoid |
|---|---|---|---|
| Short, smooth | Beagle, Boxer, Labrador | #10 blade with a 3mm or 6mm guard, or a simple clipper-only trim | Over-clipping, which exposes skin to sunburn |
| Double coat | Husky, Golden Retriever, German Shepherd | Deshedding tool first, then a #10 blade with a long guard comb for tidying only | Shaving down to the skin, the undercoat may not grow back evenly |
| Curly or wool | Poodle, Bichon, Doodle mixes | #10 blade with a 6mm to 12mm guard comb, clipped every 6 to 8 weeks | Letting the coat mat, which makes clipping unsafe |
| Wire-haired | Terriers, Schnauzers | Hand-stripping or a #7F blade for a natural look | Assuming a single pass will look even |
Quiet Dog Clippers for Anxious Pets: What Actually Helps
Quiet dog clippers for anxious pets work because noise, not the blade, is what most dogs react to. A low-vibration motor and a ceramic or titanium head cut sound at the source. But the tool is only half the fix, the other half is how you introduce it.
What "quiet" actually means in practice
Vibration matters as much as volume. A clipper that buzzes hard against the skin feels like a threat even if it is quiet, so look for a light unit you can hold steady with one hand. Ceramic and titanium heads run cooler and vibrate less than basic steel blades, which is why they show up on nearly every beginner-friendly model.
The two-week desensitization protocol
- Days 1 to 3, sight and smell. Leave the clippers switched off on the floor near your dog's bed. Let them sniff it. Treat and praise for calm behavior. Do not pick it up yet.
- Days 4 to 6, sound at a distance. Switch the clippers on across the room for 10 to 15 seconds, then off. Treat. Repeat twice a day. Move a foot closer each session.
- Days 7 to 9, sound plus touch. With the clippers on, rest the flat back of the tool against your dog's shoulder for two seconds. Treat. Work up to the neck, back, and legs.
- Days 10 to 14, simulated strokes. With the clippers on, run the back of the tool along the coat in the direction you will actually clip. No blade contact with skin yet.
Two minutes a day is enough. Most dogs that follow this sequence tolerate a full groom within two weeks; dogs that skip it usually need three or four stressful sessions before they settle, if they settle at all.
Handling technique that reduces panic
- Clip on a non-slip surface. A dog sliding on a smooth floor is already stressed before the clippers touch them.
- Use the hammock for paws and nails. Suspending the dog with legs supported removes the need to wrestle a paw into position, which is where most bites and nicks happen.
- Work in short sessions. Ten minutes, then a break. Four short sessions beat one 45-minute ordeal.
- Keep one hand on the dog. Rest your free hand on the shoulder or flank while you clip, steady contact calms most dogs more than any treat.
- Skip the bath on groom day if your dog hates water. Bathe the day before; two stressful events stacked back-to-back teach dogs to hate grooming.
When to stop and call a professional
Some dogs are not ready for a home groom, and pushing through does more harm than good. Stop and book a professional if your dog:
- Bites, snaps, or tries to bite when you touch their paws or ears
- Has a coat that is fully matted to the skin, dematting a severely matted coat is painful and is best done by someone with the right tools and experience
- Has skin that is red, broken, or infected under the coat
- Panics to the point of panting, drooling, or trying to escape every time the clippers come out
Frequently Asked Questions
What are the best dog grooming clippers for beginners?
The best dog grooming clippers for beginners combine a quiet motor, cordless design, and detachable blades for easy cleaning. The Professional Pet Grooming Kit at $39.40 offers a ceramic titanium head, four guide combs (3mm, 6mm, 9mm, and 12mm), and 60 minutes of runtime after a five-hour charge. It also includes nail clippers, a steel comb, a file, and a cleaning brush, so you get a full grooming kit in one purchase.
Are cordless or corded clippers better for beginners?
Cordless clippers give beginners more control because there is no cord to manage while positioning the clipper around paws, ears, and the belly. The Professional Pet Grooming Kit runs for 60 minutes on a charge and can also work while charging, so you are not stuck if the battery runs low mid-session. For a first clipper, cordless maneuverability usually matters more than raw power.
How do I choose the right clipper blade for my dog's coat?
Start with the guide comb that matches the coat length you want to leave behind. The Professional Pet Grooming Kit includes 3mm, 6mm, 9mm, and 12mm attachment combs, plus a thinning-out comb. For thick or matted fur, clip with a longer guide comb first, then go shorter in a second pass. Always clip with the grain of the hair and check the blade temperature against your wrist every few minutes.
How often should I oil my dog grooming clipper blades?
Oil the blade before each grooming session and again every 10 to 15 minutes during longer clips. Apply a drop or two directly on the blade while the clipper is running, then wipe away excess. If the blade feels warm or starts pulling hair, stop and let it cool before adding more oil. Regular blade maintenance keeps the cutting edge sharp and prevents pulling or damaging the hair of your pet.
What safety features should I look for in dog grooming clippers?
Look for a detachable blade for easy cleaning, skin-friendly contour-following guide combs, and a quiet motor that will not startle your dog. The Professional Pet Grooming Kit has five adjustable comb settings from 0.8mm to 2mm and comes with a Buy one, get one free US Adapter :-) HM14644. Always use a guard comb for sanitary trims and paw work, and keep a styptic powder nearby in case you nick a nail.